examples
Devices
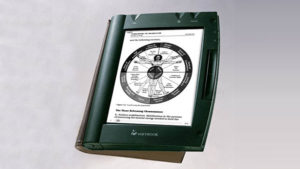
The SoftBook was the first eBook reading device, the predecessor to the iPad or Kindle. I was on the starting line-up of this start-up company. There I pioneered the look and feel for electronic reading material. I am an author on the patent for the Open eBook markup language that is harnessed to lay out books, periodicals, and documents.
Typical of a start-up, the hats I wore at SoftBook were many. I worked on developing tools used to layout reading material for the device. I wrote the Style Guide on how to lay out content. I managed a Content Conversion team to build a library of public domain books. In a Professional Services role, I was assigned our most important enterprise clients, such as the American Red Cross, the Texas Education Agency, and the House Republican Committee. I gave audience to clients’ specific document needs, devised custom systems that met their unique requirements, and taught them to then convert their content on their own.
On top of the eBook-specific work, I also designed of a number of the company’s web sites. My knack to work with very little direction and ill-defined goals and produce results nonetheless, lent to the success of SoftBook, which was then bought up by Gemstar-TV Guide.
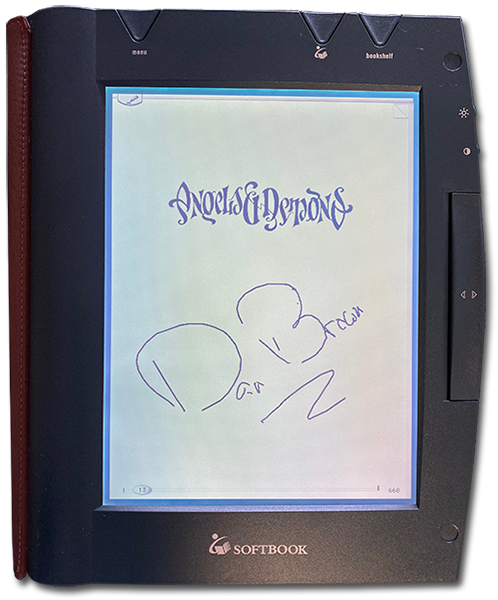
FUN FACT: I was probably the first person on the planet to get my “book” signed by an author—electronically. Dan Brown (famous for “The DaVinci Code”) was rather surprised at a book signing when I handed him a SoftBook and a stylus!
Some things gestate a long time before they emerge in some form. After reading The Hobbit in 5th grade, Smaug the dragon became a fixture in my notebook doodles right through high school. Then I got it into my head that I wanted to have a dragonhead lamp, but how to build such a thing? Hmmm. I considered that I could make his mane from cloth—no, that could catch on fire. More, “Hmmm.” Fortunately I came across the manufacturing process called, “investment casting.” It is also known as “lost wax casting.” However you call it, “investment” and “lost” are key terms to understanding what a risk you are taking when you choose this path. It is a one-shot, unrepeatable process.
FIRST MOULD
The first real-world step step after drawing plans is to sculpt out of clay the figure you have envisioned. This is the model. Then you make a two-sided plaster casting of that model. This is the mould. You separate the two halves of the mold and, yes, you rinse away the original clay. In other words, you destroy your model! So now you are left with a negative impression of your figure. You put the plaster mould halves back together and pour molten wax into the now-empty shape and swish it until a shell of wax is formed in the shape of the original figure. The plaster mold halves are removed and now there is a wax impression of the original sculpture. This wax form is cleaned up and perfected. To it, is added in more wax channels and a cone so that the wax has pathways to melt away, and also so molten metal can be poured in, with venting.
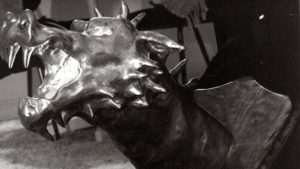
The below photo shows the cleaned-up black wax shell of the dragon head before vents and pouring cup were added to it:

SECOND CASTING
The overall wax form (core figure + channels + cone) is then submerged into plaster up to the top of the pouring cone. My plaster casting was 300 pounds! This casting is then turn upside-down and put into a kiln. The heat causes the wax to melt and burn out, leaving again, the negative shape of the wax form. While still hot, the plaster casting is turned upright so that that now-empty cone shape is visible and molten metal (in my case: brass) is poured into the cup. Then you say a prayer and wait for all to cool.
MOMENT OF TRUTH
This is the point where you find out if your investment, your roll of the dice, will pay off. You literally sledgehammer the plaster away from the metal shape within it. If the gods were smiling, all the nooks filled in with metal and your original figure (with the addition of some metal channels and pouring cone) will be revealed. In my case, all went very well. I just needed to hack off the extraneous metal channels and cone and clean up the brass shape.
This was quite an involved process and I actually left out a lot of the strategy that is required in investment casting. (It wasn’t just prayer and the gods that lent to things going as well as they did: there was much forethought and planning!) After all that I described above, the brass dragon head sculpture could certainly stand on its own right. Although kind of kitsch-y, I still wanted it to be a proper working lamp. So I fabricated a plaque that held a lightbulb socket and a welded mount strong enough to hold the heavy brass head and neck (it had quite the moment arm). I screwed in a red bulb to give the impression of fire coming from the mouth and eyes, et voila: a dragonhead lamp! Smaug lives again.
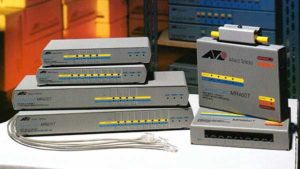
One of my early gigs entailed designing the overlays used on networking hardware. There had to be a “family look” (recognizably an ATI product) amongst devices of all shapes and sizes. And the meaning of the LED lighting had be be clear and consistent. I used Adobe Illustrator for these layouts.
Video Production

The above “Tech Talk with Socko” segment won “Best Short Subject” from the San Jose Film and Video Commission, (also known as a ‘JOEY’ award). This was my favorite segment from a children’s television show pilot called, TechKnowledge, which I co-hosted. Even though I was mainly ‘the talent’ in this show, it provided experience and insight for all that goes into video production such as writing, lighting, acting, direction, and green-screening.
Exasperating as he can be, Socko and I remain friends to this day. ;-)

When trying to promote a potentially ‘dry’ product, how do you stand out from the crowd of other ‘dry product’ sellers? Well, what do insurance companies do to sell their dry product? They have a spokesperson! Think Mayhem. Think Flo. Think the Gekko. So meet “Uni,” a memorable spokesperson—well, spokescreature—who encouraged you along the exciting path of getting your company’s data backed up properly.
I found it not only enjoyable to create the Uni character, but to then bring her to life in animation. The work behind the above video included tight (and super fun) teamwork, scripting, storyboarding, choosing voices, choosing the right music, scheduling, and direction.
A brand is really a tool, and solidifying one’s brand makes going to market SO much easier. Marketing can more confidently and easily create adverts and landing pages. Meanwhile the sheer fact of being recognizable gives a leg up to your sales team: instead of wasting time explaining who you are, Sales can get right to what a company can uniquely do for the customer.
This is one of a matching series of videos I produced where SmartBear product owners each welcomed new users to their software trial with encouragement. Such little two-minute videos look deceptively simple but behind the curtain is much planning, budgeting, scripting, schedule coordination, cat herding—even T-shirt production :-)—and finally direction of talent and editing.
First, independent of the product owners, I developed a standard intro and outro with animation and audio. These quick video bookends were for ALL SmartBear videos so they would be consistently branded in an unobtrusive way.
In advance, scripts had to be written, read out loud, rewritten, and practiced out loud, until they fit the story in the 2-minute format.
Our very tight budget meant all videos needed to be shot in one day. Distributed players had to get to the studio (even fly in) for that day, and segments had to be recorded within the allotted timeframe. The talent (the product owners), remember, were not professional actors. We intentionally wanted customers to know that they have a direct connection to real people; approachability was part of our brand. That raised the degree of difficulty on getting the shots done as intended within the tight schedule. With kind direction, I got everyone through and captured everything we needed on time.
Finally we knitted appropriate product shots with the scripts. The result was a suite of consistent videos across product lines where potential customers got to see the faces of people who actually cared as they experienced our software for the first time.
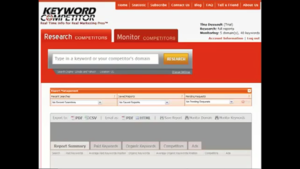
The above video is an introductory tutorial video I made for our SaaS SEO product, “Keyword Competitor.” Its scripting is UX writing before “UX writing” was a thing.

Above is the full award-winning half-hour TV show pilot, “TechKnowledge.” It won two San Jose Film and Video Commission JOEY awards (Nov 2001) for “Best Entertainment Program” and “Best Short Subject.” It also won the prestigious PARENTS’ CHOICE AWARD and an EMMY nomination by The National Academy of Television Arts and Sciences! (Not shabby for a team of people with full-time jobs putting the show together on nights and weekends.)
Even though I was mainly ‘the talent’ in this show, it provided experience and insight for all that goes into video production such as writing, lighting, camera, direction, choreography, green-screening, audio dubbing, acting, teamwork, and promotion.

The above “Electric Flowerpot” segment is from a children’s television show pilot called, TechKnowledge, which I co-hosted. Even though I was mainly ‘the talent’ in this show, it provided experience and insight for all that goes into video production such as writing, lighting, camera, direction, green-screening, editing—and in this case: singing and choreography!
Software UI
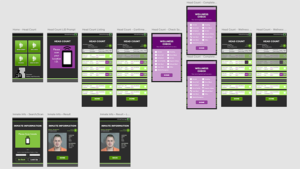
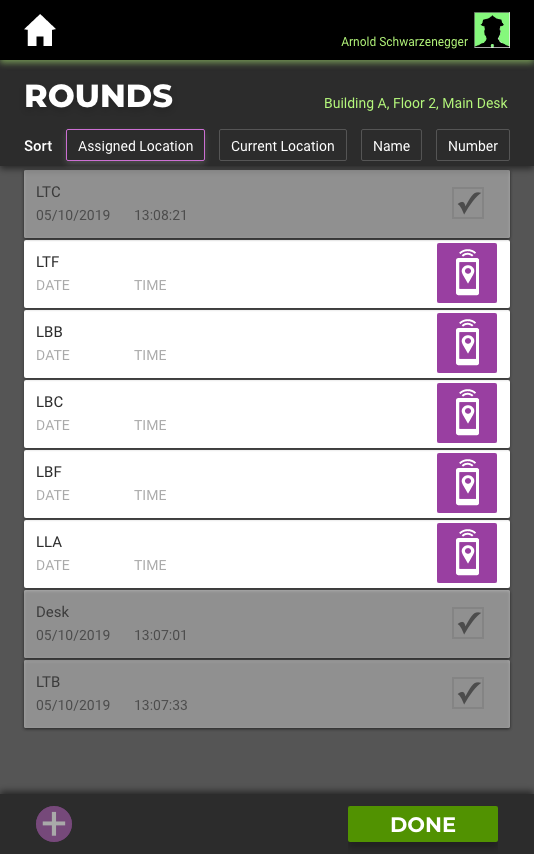
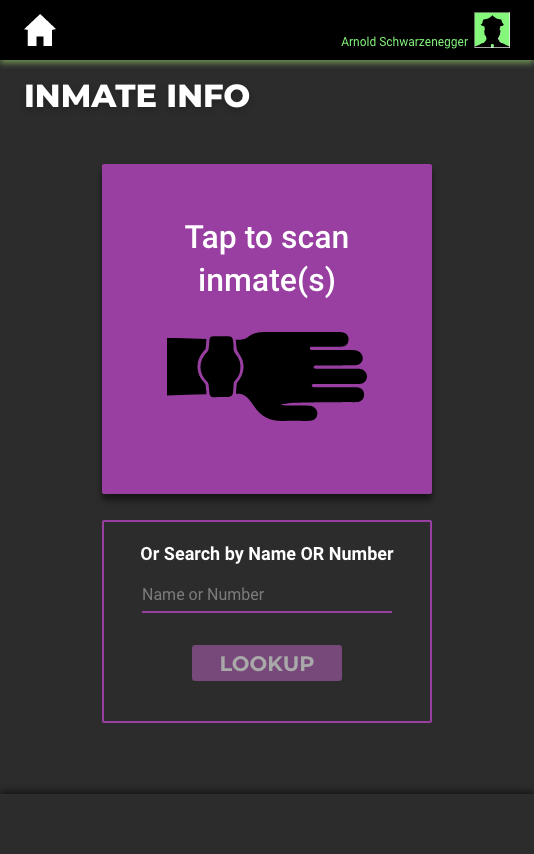
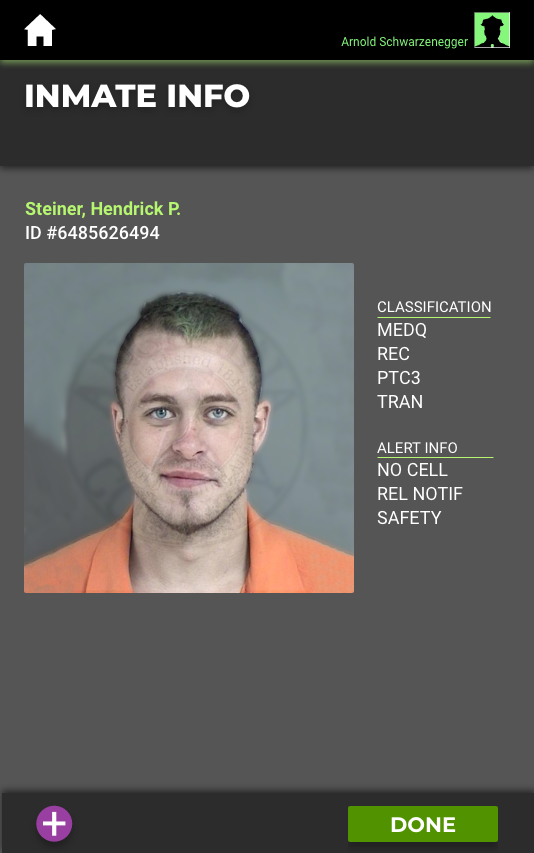
The above prototype, done in Adobe XD, was for a app intended specifically for an Android pad. It was an app to be used by prison guards as they went about their tasks of doing head counts and checking on the health of inmates. The beauty of being able to do rough prototypes like this is that they help clarify sometimes unclear requirements. The act of building actually helps you think better. You learn by making. Prototypes also help the Sales team make early presentations, and collect early feedback from the customer when the tool is not actually built yet. The video demonstration of the above prototype actually kept us in the running for the bid! Prototype early, and prototype often.
Scope:
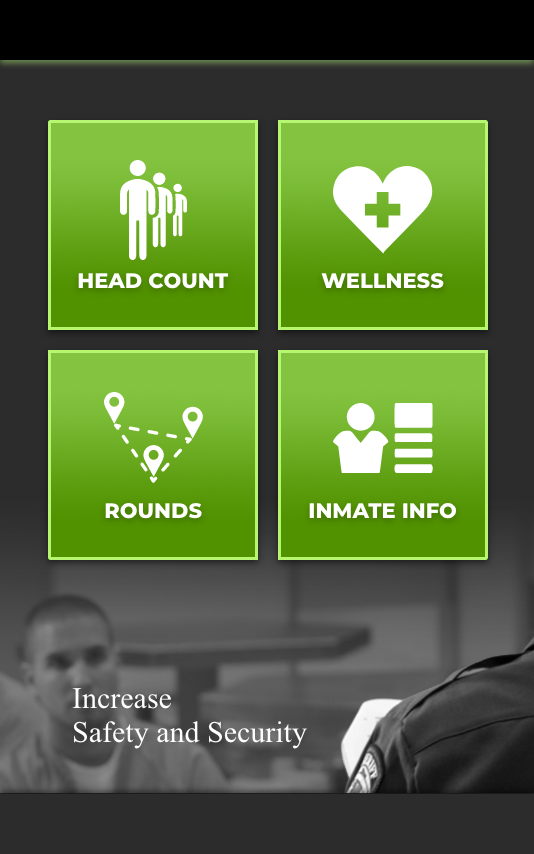
This software app was intended for use on Android pads carried by correctional officers needing to perform four basic functions:
- Rounds
- Wellness Checks
- Head Counts
- and looking up Inmate Info.
Problems:
The client was a county jail whose correctional officers (COs) performed their duties manually from Microsoft Excel printouts:
- Printouts are not living documents and can often be out of date the moment after they are printed.
- Notes made to printouts need to be manually transcribed into a computer at a later point for records and reporting.
- Notes made to printouts may be inaccurate via human error.
- Printouts do not always contain thorough information, as that would be too bulky to carry.
The client wanted to harness modern technologies such as radio frequency identification (RFID) and mobile apps to make their operations more efficient and accurate. As an engineering company specializing in RFID technology, we put in a bid to provide a solution for them.
Solutions:
- The jail would have RFID tags strategically placed around the facility to mark locations. (I was not invloved in this part.)
- There existed the option was to have the inmates wear robust bracelets that could be tracked and scanned. (I was not involved in this part.)
- The CTO tasked me with creating the UI to support the four CO functions—1.Rounds, 2.Wellness Checks, 3.Head Counts, and 4.Inmate Info—on an Android pad, which I did by:
— clarifying requirements with the engineering team.
— documenting use cases.
— storyboarding CO journeys.
— rapid prototyping the four functions using Adobe XD.
— collaborating with front and back-end engineers as they needed support while coding the app out.
Results:
- My Adobe XD demo was easy to understand and pleasing to the client such that we earned a place in the bid.
- The prototype was an early oppportunity to get more feedback from the client.

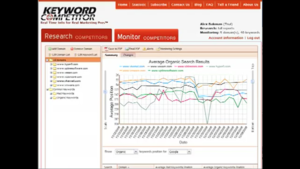
This is a video where I do a tutorial to explain to our customers how to use the powerful graphing interface for this SaaS SEO tool. I wrote the script for the tutorial as well, so you can get an idea of how I am as a UX WRITER.
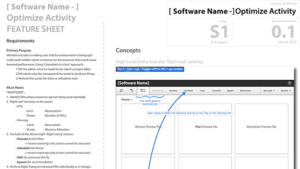
This is an example of a high-level summary around just one feature—optimization—in a piece of virtual environment monitoring software. It captures the main requirements and use cases that must be addressed when making the design. This happens to be for software but you can make a one sheet to present or promote anything.

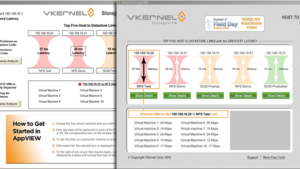
I was not even on the software team when this transition came about. I was on the Marketing team and just happened upon a free tool that the company was offering. I found the information to be, well, all over the place, and hard to quickly parse. Even though I did not fully have a grasp of what the tool was all about, I did have a sense of how to order and group information, even information that I did not yet fully understand! So I gently slipped an ideation to someone on the Dev team that we could perhaps approach the UI for the tool another way.
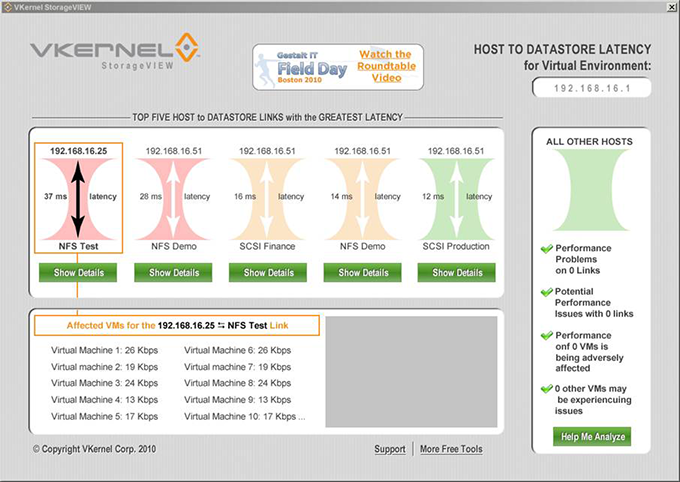
This is the BEFORE version that I happened upon:

And this is the AFTER ideation I gave to Dev:
Once the CEO laid eyes on my ideation, he order that my version be built. That was probably a tad premature, because you never get it right in one shot. Once a developer on the Dev team saw that it “was allowed” to think differently and offer up new ideas, he made a further suggestion that the “passages” be turned horizontally and stacked. I actually agreed with that second take, but this version was already in the works. Nonetheless, I think the moral of the story is that there is always room for improvement and other perspectives.
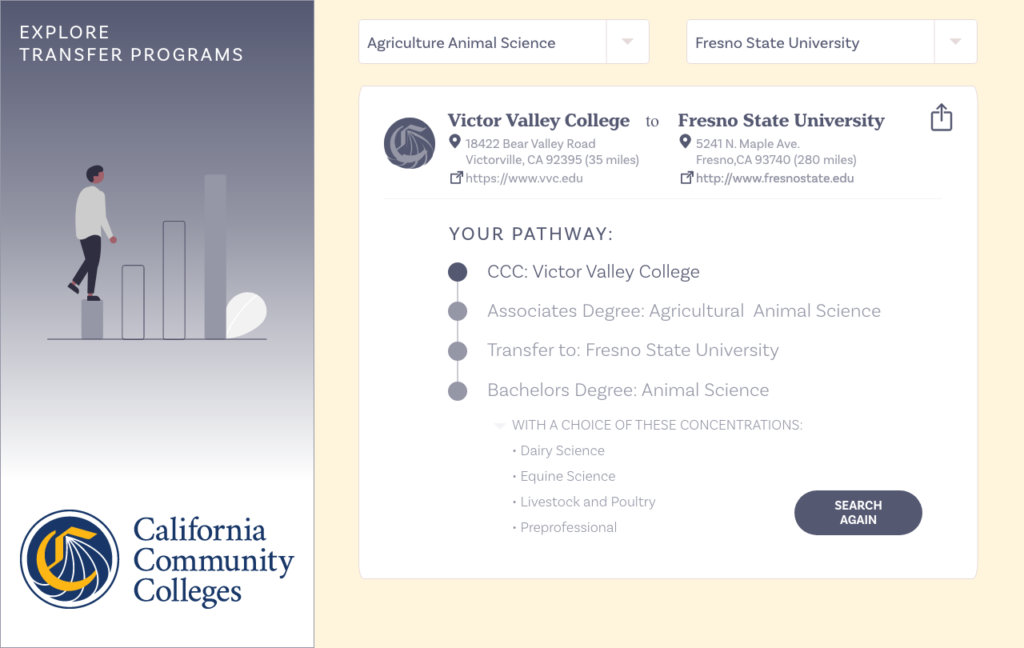
This is a video demo created in Adobe XD. It is a rapid prototype of merely the first ideation for a rework of an online tool on the California Community College Website.
Scope:
The goal of this tool is to help students find associate degree programs at the school of their preference that are eligible for a transfer to select 4-year universities. Certain associate degree programs are only available at specific community colleges. The final result of this tool is to display a pathway starting with enrollment in a transferable degree at a CCC Campus to a university where they can then earn a 4-year degree of their choosing including visibility of the sub-concentrations available with that university degree.
Problem:
Potential students don’t know what options are available to them when planning their path to a 4-year degree transfer. The original tool falls short in making the robust tool functional through a lack of UX understanding. With almost 20,000 results and various criteria combinations it is difficult to help users focus. (Link for the original tool that needs rework: https://adegreewithaguarantee.com/en-us/Find-Colleges)
Goal:
Design a tool that allows a user to use the information they know, and filter results to better understand their options and the path they need to follow. This tool shows what programs you can take to start at a community college and what degree they will need to transfer into which specific programs at which specific colleges.
Assumptions:
A user knows (at least) one of the following:
- The California region they wish to study in
- The CCC Campus they want to attend.
- The Associate’s Degree program they want to pursue.
- The 4-year University they want to transfer to.
Designer Notes:
There are many ways to skin this cat and I was thinking a Zillow/AirBnB-esque approach would be optimal. (As a user, I very much like the list display changing according to what portion of the map I have visible.) This approach is especially applicable for a user coming in from the “I have a desired location” angle.
For this task, the user may want to come in from four angles:
- Location (via form field search OR map panning/zooming)
- Specific Community College
(I actually view this as a subset of Location) - Major
- University
While this first prototype does not yet capture my full-blown ‘Zillow’ vision, the idea is:
— Come in via the data door of your choosing.
— Filter from there.
— And based on your filters, your options in the other data areas should downsize so that the lists become less daunting.
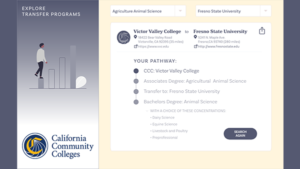
In the above video of the prototype that I was using to help me think things through, I demo’ed coming in from a Location, and then from a CCC. If entering via Major and University, the winnowing should be similar from those angles as well. (Notice how once the ‘Agriculture Animal Science’ major is selected, the CCC list drops down to just one, AND there are only three possible universities you can transfer to compared to the original full list.)
Part of the explosion of results in the original tool is caused by the sub-concentrations being broken out into individual results. What would be more helpful to the user is to have the information of “Starting at CCC A —> Ending at Uni B” all be contained on one shareable results card. As a student, I would like to be able to see all the potential concentrations I can choose from at a particular University be listed in one save-able place:
Website Design
This is a video demo created in Adobe XD. It is a rapid prototype of merely the first ideation for a rework of an online tool on the California Community College Website.
Scope:
The goal of this tool is to help students find associate degree programs at the school of their preference that are eligible for a transfer to select 4-year universities. Certain associate degree programs are only available at specific community colleges. The final result of this tool is to display a pathway starting with enrollment in a transferable degree at a CCC Campus to a university where they can then earn a 4-year degree of their choosing including visibility of the sub-concentrations available with that university degree.
Problem:
Potential students don’t know what options are available to them when planning their path to a 4-year degree transfer. The original tool falls short in making the robust tool functional through a lack of UX understanding. With almost 20,000 results and various criteria combinations it is difficult to help users focus. (Link for the original tool that needs rework: https://adegreewithaguarantee.com/en-us/Find-Colleges)
Goal:
Design a tool that allows a user to use the information they know, and filter results to better understand their options and the path they need to follow. This tool shows what programs you can take to start at a community college and what degree they will need to transfer into which specific programs at which specific colleges.
Assumptions:
A user knows (at least) one of the following:
- The California region they wish to study in
- The CCC Campus they want to attend.
- The Associate’s Degree program they want to pursue.
- The 4-year University they want to transfer to.
Designer Notes:
There are many ways to skin this cat and I was thinking a Zillow/AirBnB-esque approach would be optimal. (As a user, I very much like the list display changing according to what portion of the map I have visible.) This approach is especially applicable for a user coming in from the “I have a desired location” angle.
For this task, the user may want to come in from four angles:
- Location (via form field search OR map panning/zooming)
- Specific Community College
(I actually view this as a subset of Location) - Major
- University
While this first prototype does not yet capture my full-blown ‘Zillow’ vision, the idea is:
— Come in via the data door of your choosing.
— Filter from there.
— And based on your filters, your options in the other data areas should downsize so that the lists become less daunting.
In the above video of the prototype that I was using to help me think things through, I demo’ed coming in from a Location, and then from a CCC. If entering via Major and University, the winnowing should be similar from those angles as well. (Notice how once the ‘Agriculture Animal Science’ major is selected, the CCC list drops down to just one, AND there are only three possible universities you can transfer to compared to the original full list.)
Part of the explosion of results in the original tool is caused by the sub-concentrations being broken out into individual results. What would be more helpful to the user is to have the information of “Starting at CCC A —> Ending at Uni B” all be contained on one shareable results card. As a student, I would like to be able to see all the potential concentrations I can choose from at a particular University be listed in one save-able place:

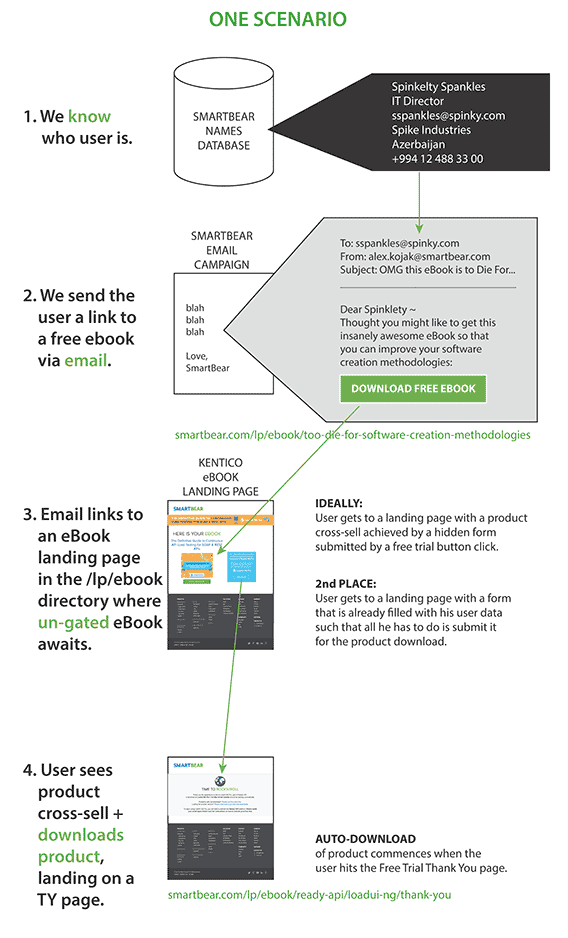
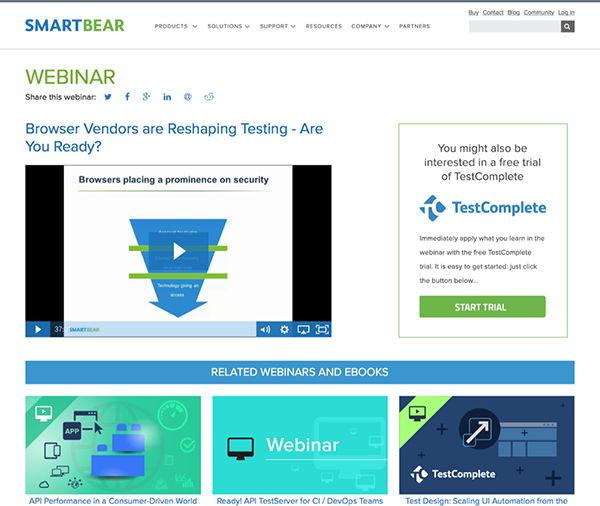
The landing page is a specialty breed of web page whose goal is to deliver to the user the info that s/he proactively sought. In the above example, the user has already provided basic contact information be able to view this on-demand webinar. Around the delivered webinar, supporting elements are made available: sharing links; related webinars or ebooks if the user wants to further investigate the topic; or access a trial for the tool mentioned in the webinar (which is also helpful to the company).
To make things as easy for the webinar attendee as possible, once the “Start Trial” button was pressed, the information already gathered before watching the webinar is auto-fed into the trial sign up process. This is so he is not asked to re-enter information already provided to the company. (Don’t you greatly dislike when you provide info in a phone tree, and then get asked the same information all over again when you finally get to a human rep?) The user must be put at the center of the UI.
This flow worked whether a known user in our database had been alerted of educational content by a marketing email or if the user discovered the content in the Resources section of the company website:
This is what the broader landing page looked like:
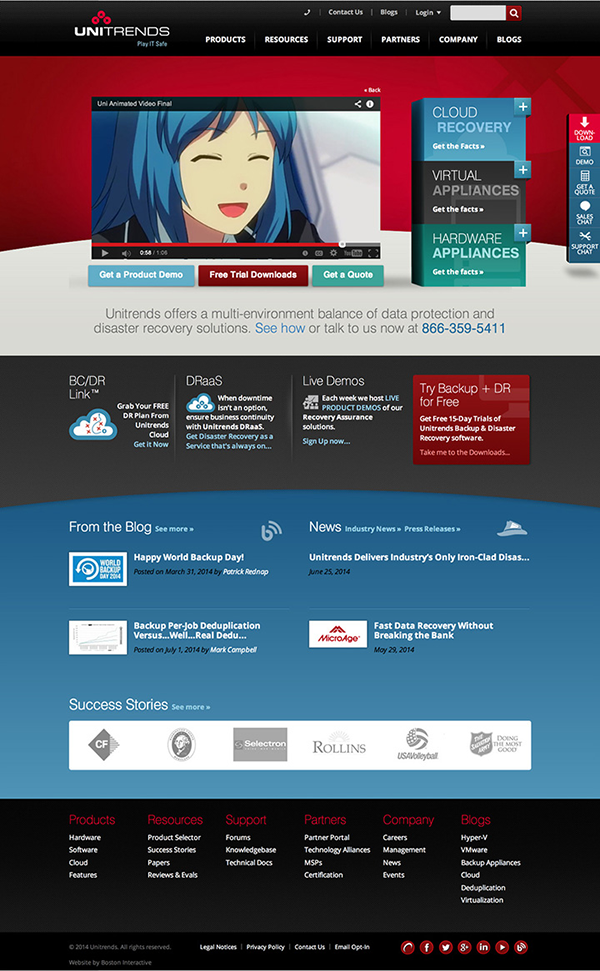
This backup and recovery solutions company recruited me to oversee the overhaul of their corporate website so that it would represent a more mature brand. But brand goes deeper than looks: it stands on the foundation of wellthought-out systems for good UX for all stakeholders, front-end and back. I shepherded the website from Joomla to the Kentico content management system. I implemented the site’s first conversion goal tracking and continuously iterated on the UI to optimize lead generation. This included backend UI design to streamline content contribution for operational efficiency and SEO.
I quite liked this site as it did not look like EVERY, OTHER, site. I quite value singularity.
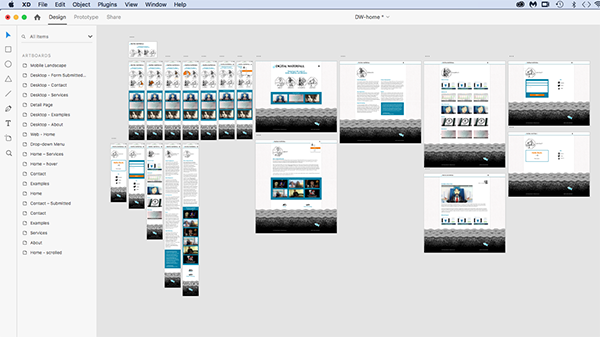
Of course THIS website* that you are on right now I mocked up and prototyped in Adobe XD as you can see from the canvas below. :-)
But before I experienced the glory of Adobe XD and InDesign, I often used Photoshop for web site page mocks.
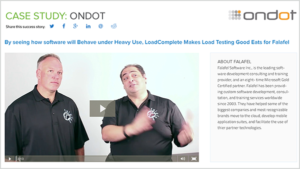
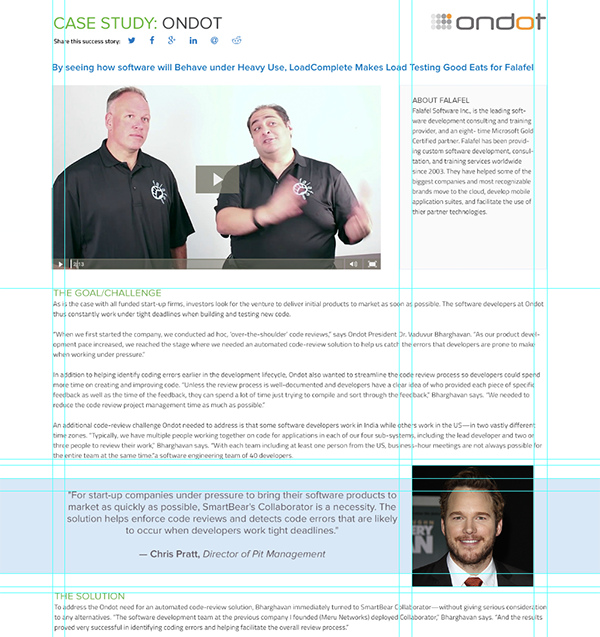
In this example, I am showing standard elements of a case study and how the page would behave when scrolled.
SCROLLED:
FULL PAGE:

Thank goodness for prototyping tools! Productivity is much accelerated and it is SO much easier to collaborate now.
*Then I actually built this site using WordPress.
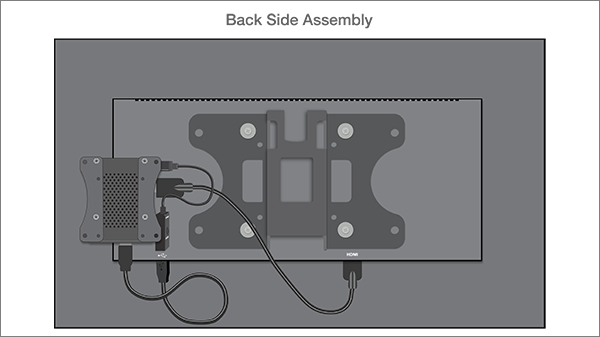
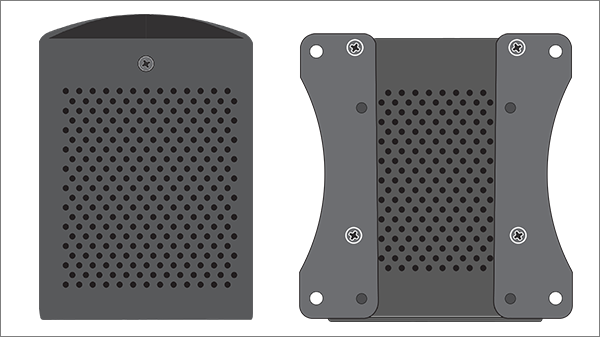
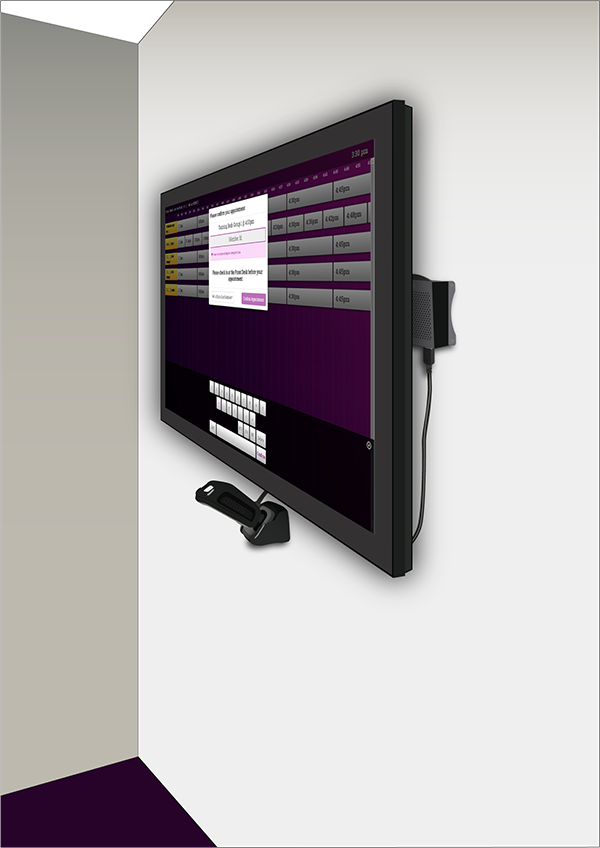
Drawing

Here are some drawings I made in Adobe Illustrator and Photoshop. They are to illustrate a manual for equipment used at Planet Fitness facilities.
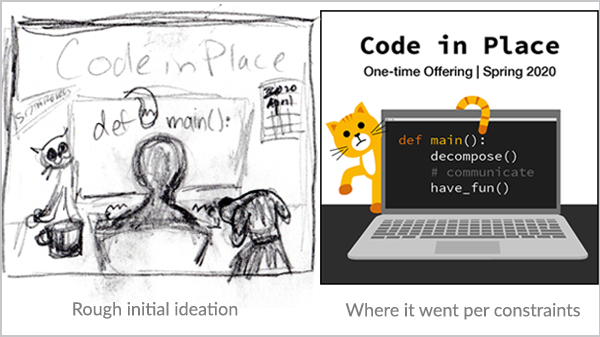
CODE IN PLACE PROJECT
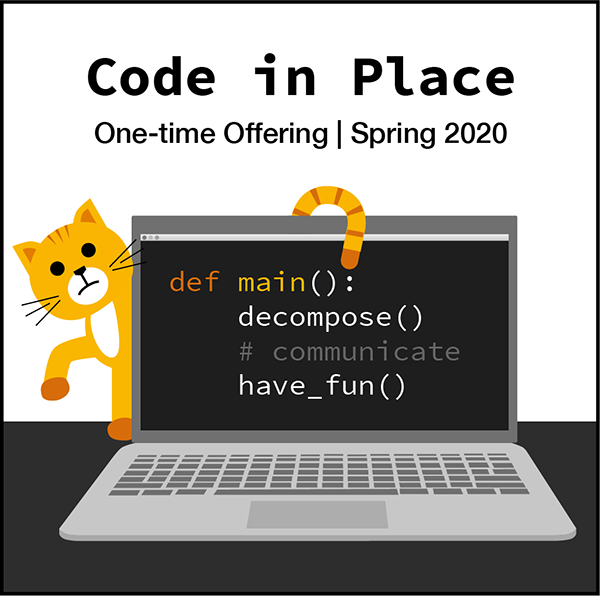
Here is a fun image I just made for the experimental Stanford “Code in Place” project. This community service project is the Stanford Engineering Department’s response to the COVID-19 stay-at-home order around the world. A group of computer science instructors came together to offer teaching services free of charge for people 18 years of age and older who want to learn to program in Python. Over 80,000 people around the world applied, and 10,000 made it in. I was one of the fortunate 10,000 and made the below quick Tee-shirt image in honor and gratitude of what and how we were learning.
When the BBC filmed the show “AutumnWatch” from the Squam Lakes Natural Science Center* here in New Hampshire in 2018, one of the segments was an interview with renowned wild bird illustrator, David Shibley. He made the remark, “A drawing is a picture of our understanding. If you don’t understand something, you can’t draw it.” That is exactly how I feel about drawing—and prototyping for that matter: the act of building helps you understand and flesh out the product better. Drawing and prototyping, you are getting to truly know the subject.
When going off on my own to pin down a subject, I often start in pencil. It is in essence a plan. Pencil is forgiving and you can correct your “misunderstandings.” Only once I have the idea in place, will I then start adding the commitment of marker, as you can see started on this drawing of a car engine part come to life: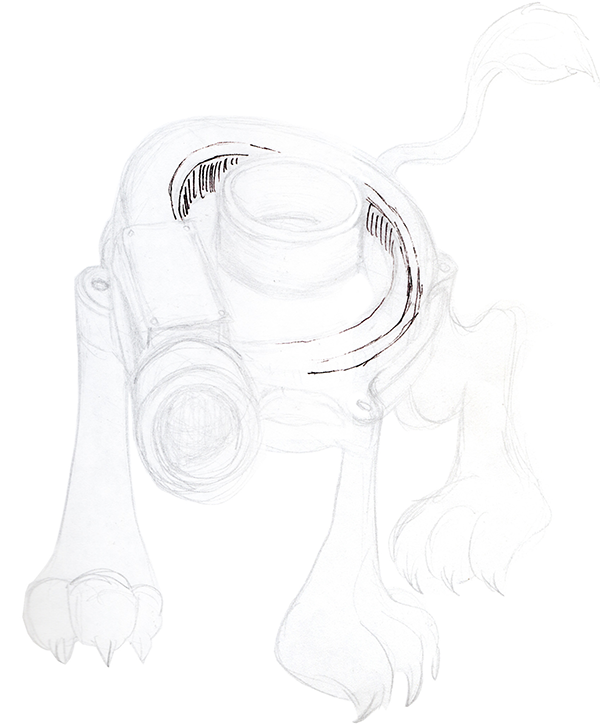
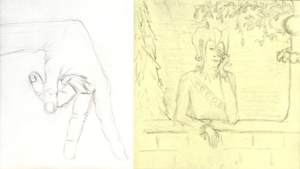
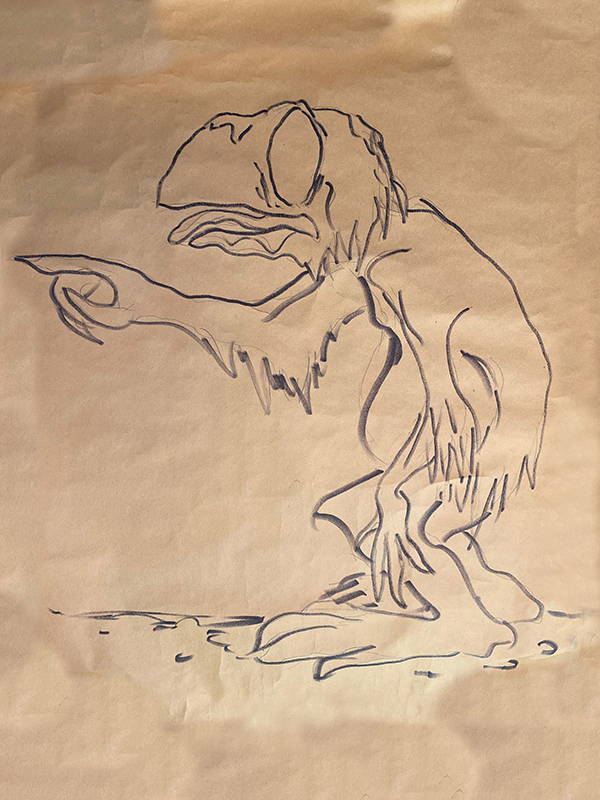
And here our pal, Golem, fully committed to marker over the original pencil:
Even when working on the tee-shirt design for the Stanford Code in Place project, I started with a more complicated composition idea. But there was limit on number of colors and the deadline was short, so massive simplification kicked in:
*I happen to be a docent at the Center as well!
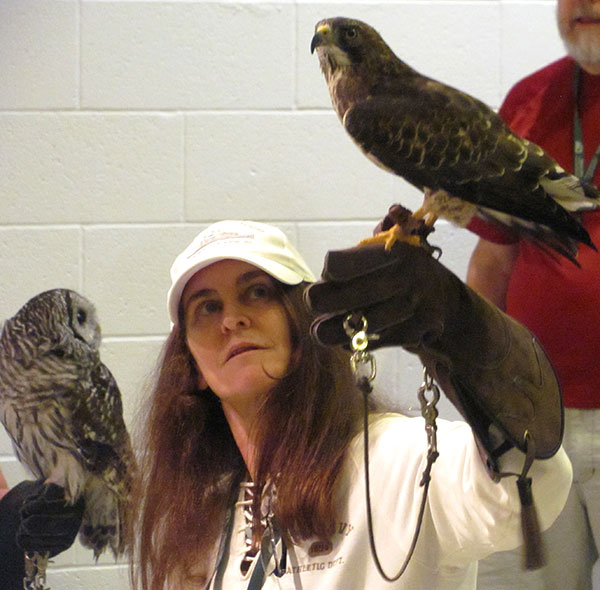
Here I am holding a broad-winged hawk.
I love whiteboarding. This is no surprise, as I am a visual thinker: I cannot “think in the air.” I need to put things down to both explain (communicate) as well as to be sure that I understand (reiterate). It’s a wonderful tool for brainstorming and early-stage storyboarding.
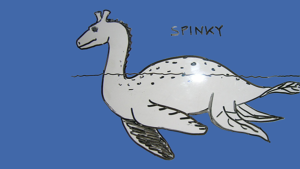
The top image came forth after watching the movie, The Waterhorse, (great movie by the way) to show how cute the Lock Ness monster might actually be.
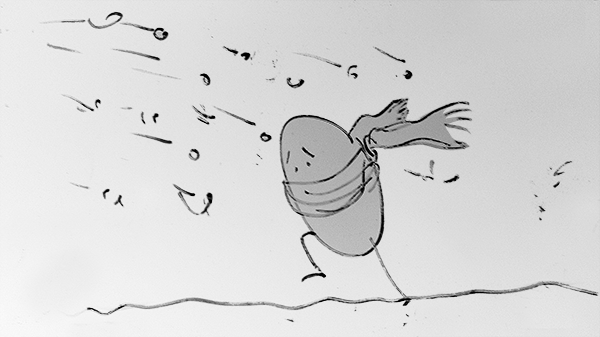
The whiteboard is a great medium for getting things down FAST too. Once when explaining the expression “obvious as an egg in a snowstorm” (meaning a white egg isn’t very visible against a white snowy environment) a different kind of story popped into my mind. I thought of a larger plot about a poor egg trying to make its way through a snowstorm, and had to quickly get it down.

Who doesn’t love the forgiveness of charcoal? And who better to do in black and white than lead singer of my favorite band, The Cure. Here is Robert Smith in all his howling glory. Good music continues to be the greatest motivator of creation for me: it just sets my brain on fire.
TAKE ON ME
Hands-down, my favorite music video of all time is “Take On Me” by A-ha. It is because of the distinctive sketch-drawings in motion. Morten Harket is also one of the most beautiful humans ever to be born, and that of course helps. I tried to imitate that sort of sketching by drawing eyes in that fashion…
There is something to be said about the lovely organic feel of black and white charcoal in this age of machines.
When I attended the Adobe MAX show down in San Diego one year, Quentin Tarantino was one of the headline guests. He spoke of how each of his movie plots came from listening to music: that a story just starts taking shape his mind from the songs. I sat up, more engaged, “That’s how my brain works too!” For instance, when I am out for a run, earbuds in, the real world disappears and a cinema goes up in my mind. Music is hugely important to me and paints stories in my head.
MAIDEN
The above image is one born from a combination of the real world, and the song, “If You Go” by The Hothouse Flowers. A friend of mine had just chosen to leave the planet and I did not know what to do with that. So when listening to this song…I just drew.
BROKEN HEART
This is what came to mind when processing The Cure lyrics:
So I trick myself
Like everybody else
I crouch in fear and wait
I’ll never feel again!
If only I could
If only I could
If only I could remember
Anything at all…
Give me a song and I’ll envision a story.